Today we will discuss ways to showcase your photography work. Don't let you work kept undiscovered in your folders! It is good to learn how much people can actually make money from their hobbies and photography can be one of them! Dear students, I hope everything is fine :) I received few complaints from some of you about their failure to view comments in their blogs. Yesterday I posted an entry on how to change commentary setting in Weebly (VIEW HERE). After a while, I came across another possibility that cause the complaint. Do you know that there are few main differences between ‘standard page’ and ‘blog page’? 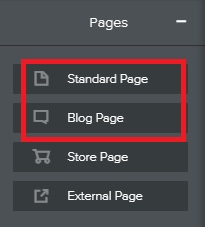 Firstly, if you chose ‘blog page’, your entry will be arranged according to the date/time it was published, with the latest on the top of the list followed by previous entries. On the other hand, if you created your blog pages using ‘standard page’, anything you shared will not be listed by date. In fact, there is no date indicated to each item you shared in ‘standard page’!
Secondly, in ‘blog page’, by default, a commentary section will be provided by Weebly. Meaning, to each entry, there will be a commentary space for your blog readers to share their thoughts. However, in ‘standard page’, you will not get that feature! And I strongly believe that the main factor that caused your problem is actually the selection of pages you created. For those who were affected with this problem, please log in to your Weebly account again and check whether you used ‘standard page’ or ‘blog page’. If you happened to use ‘standard page’, all you need is to change to ‘blog page’ .. well .. I mean you need to create a new ‘blog page’ and copy all the items you posted in the current ‘standard page’. Guys, I hope this explanation helps you to resolve the problem. All the best! Aperture refers to the opening of a lens's diaphragm through which light passes. It is calibrated in f/stops and is generally written as numbers such as 1.4, 2, 2.8, 4, 5.6, 8, 11 and 16. The lower f/stops give more exposure because they represent the larger apertures, while the higher f/stops give less exposure because they represent smaller apertures. 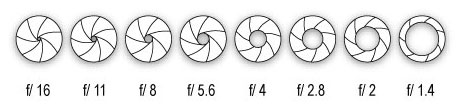 How Aperture Affects Depth of Field Depth of field is defined as "the zone of acceptable sharpness in front of and behind the subject on which the lens is focused." Simply put: how sharp or blurry is the area behind your subject. Here's the equation: The lower the f/stop—the larger the opening in the lens—the less depth of field—the blurrier the background. The higher the f/stop—the smaller the opening in the lens—the greater the depth of field—the sharper the background. How Aperture Affects Shutter SpeedThe f/stop also affects shutter speed. Using a low f/stop means more light is entering the lens and therefore the shutter doesn't need to stay open as long to make a correct exposure which translates into a faster shutter speed. Again, the reverse is true: using a high f/stop means that less light is entering the lens and therefore the shutter will need to stay open a little longer which translates into a slower shutter speed. Where to Find the Aperture All lenses have a maximum aperture, and all NIKKOR lenses list the widest possible aperture on the lens barrel. Some zoom lenses will detail something like f/3.5-5.6 on the lens barrel or 1:3.5-5.6 (below right). These numbers, the 3.5 and the 5.6, are referring to the maximum aperture or widest opening the lens can achieve for each end of the zoom range. Some higher end lenses can maintain the largest aperture throughout the entire zoom range, so only one number is detailed (below left).  The rule of thirds is a powerful compositional technique for making photos more interesting and dynamic. It's also perhaps one of the most well known. Using the 'Rule of Thirds' is not something that you have to do, but it goes a long way to improving your photography. The rule of thirds states than an image is most pleasing when its subjects or regions are composed along imaginary lines which divide the image into thirds — both vertically and horizontally: 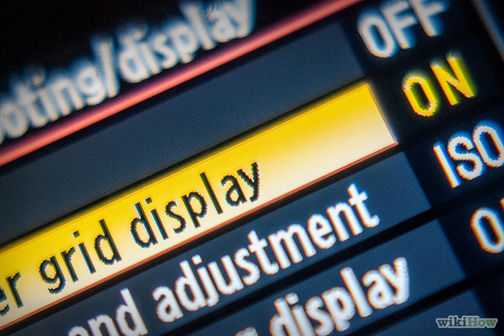 1. Check your camera to be sure that it has a grid. A lot of cameras these days have that capability. 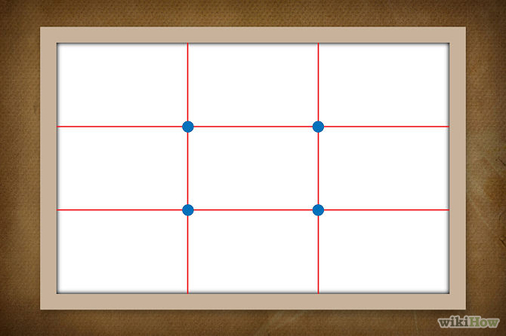 2. With this grid in mind the ‘rule of thirds’ now identifies four important parts of the image that you should consider placing points of interest in as you frame your image. The theory is that if you place points of interest in the intersections or along the lines that your photo becomes more balanced and will enable a viewer of the image to interact with it more naturally. Studies have shown that when viewing images that people’s eyes usually go to one of the intersection points most naturally rather than the center of the shot – using the rule of thirds works with this natural way of viewing an image rather than working against it.  3. With the 'visual' of the rule of thirds, take a photograph. Be sure the subject of your image is at the crosshatch whenever possible. Even if it isn't at the crosshatch, but at the location of a third; left, right, top, bottom. In this screenshot, you see that the eyes are at the top third.  4. Be sure that the point of interest is at the intersection of the crosshatches, either real or imagined. Using the Rule of Thirds comes naturally to some photographers but for many of us takes a little time and practice for it to become second nature. In learning how to use the rule of thirds (and then to break it) the most important questions to be asking of yourself are:
Here are more examples of photos taken using this rule: 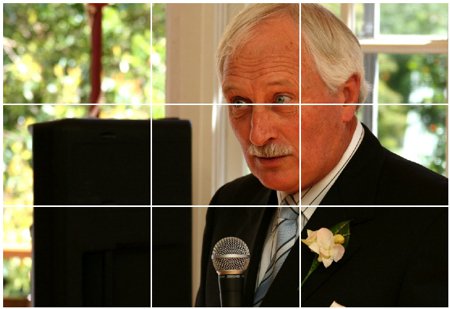 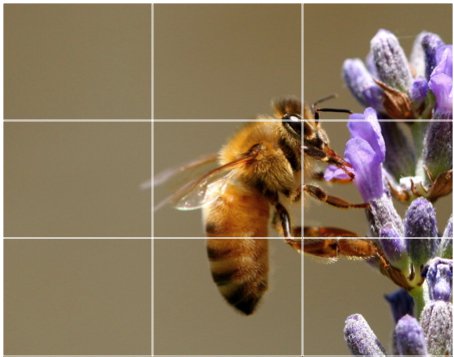 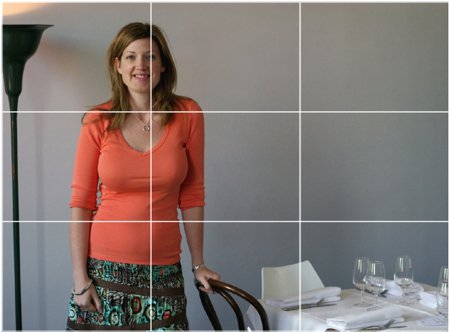 Shutter Speed is one of the three pillars of photography, the other two being ISO and Aperture. Shutter speed is where the other side of the magic happens – it is responsible for creating dramatic effects by either freezing action or blurring motion. What is camera shutter? Simply put, a camera shutter is a curtain in front of the camera sensor that stays closed until the camera fires. When the camera fires, the shutter opens and fully exposes the camera sensor to the light that passes through the lens aperture. After the sensor is done collecting the light, the shutter closes immediately, stopping the light from hitting the sensor. The button that fires the camera is also called “shutter” or “shutter button”, because it triggers the shutter to open and close. What is shutter speed? Shutter speed, also known as “exposure time”, stands for the length of time a camera shutter is open to expose light into the camera sensor. If the shutter speed is fast, it can help to freeze action completely, as seen in the above photo of the dolphin. If the shutter speed is slow, it can create an effect called “motion blur”, where moving objects appear blurred along the direction of the motion. This effect is used quite a bit in advertisements of cars and motorbikes, where a sense of speed and motion is communicated to the viewer by intentionally blurring the moving wheels.  Slow shutter speeds are also used to photograph lightnings or other objects at night or in dim environments with a tripod. Landscape photographers intentionally use slow shutter speeds to create a sense of motion on rivers and waterfalls, while keeping everything else in focus. 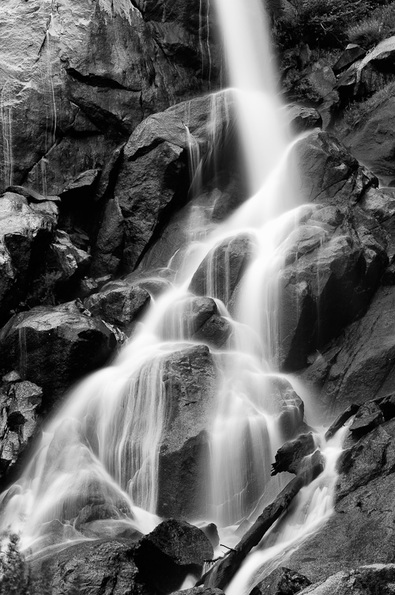 Motion can also be frozen to an extent with a camera flash, even at low shutter speeds. Take a look at this example: 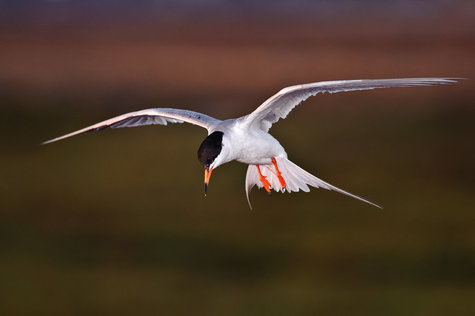 How shutter speed is measured? Shutter speeds are typically measured in fractions of a second, when they are under a second. For example 1/4 means a quarter of a second, while 1/250 means one two-hundred-and-fiftieth of a second or four milliseconds. Most modern DSLRs can handle shutter speeds of up to 1/4000th of a second, while some can handle much higher speeds of 1/8000th of a second and faster. The longest shutter speed on most DSLRs is typically 30 seconds (without using external remote triggers). How to set shutter speed? Most cameras handle shutter speeds automatically through in-camera metering. When the camera is set to “Auto” mode, both shutter speed and aperture are automatically selected by the camera. When you shoot in “Aperture Priority” mode, you set the lens aperture, while the camera automatically sets the shutter speed. There are two ways to manually set the shutter speed: a) By setting the camera to “Shutter Priority” mode, where you set the shutter speed and the camera automatically selects the aperture. How to find shutter speed? b) By setting the camera to “Manual” mode, where you set both shutter speed and aperture manually. Do you know how to find out what your camera shutter speed is set to? It is typically very easy to find the shutter speed. On Nikon DSLRs that have a top panel, the shutter speed is typically located on the top left corner. See example below:  If you look through the viewfinder, it should also be the number on the bottom left side of the screen. On most DSLRs, you will not see the shutter speed as a fraction of a second – it will typically be a regular number. When the shutter speed is slower than or equals to one second, you will see something like 1″ or 5″ (the ” sign indicates a full second).
If you still can’t find the shutter speed, set your camera to “Aperture Priority” mode, then look into the viewfinder and point at a really dark area. Remember the numbers in the display, then switch to a very bright area and see what number changes. The number that changes is your shutter speed. Reference: https://photographylife.com/what-is-shutter-speed-in-photography More reading on shutter speed: http://www.digitalcameraworld.com/2014/03/20/what-is-shutter-speed-7-questions-new-photographers-always-ask/ |
Welcome to your photography site!!
What do you want to read?
All
Useful LinksKen Rockwell
Hong Kiat SLR Lounge Poppohoto Nikousa Mir WikiHow Cambridge in Colour Digital Photography School Digital Camera World Smashing Magazine Belajar Kamera Your Weebly!!ATIYAH NADHIRAH BINTI SALIM
Ramyah a/p V. Rajendran Nurul Nabila Saad Nurul Huda Mohd Farith Auswenik a/p Paramasivan Mohammad Syazwan Abd Rahim Meor Mohamed Azri Meor Idris Sherry Michelle anak Bumpoh Nur Amanina Sarib Hassan Siti Nazirah Mazlan Muhamad Malyan Saputra Nur Syahirah Mydin Atiyah Nadhirah Salim Izad Firdaus Ya'kob  This work by Dr. Fariza Khalid is licensed under a Creative Commons Attribution-NonCommercial-ShareAlike 4.0 International License. Based on a work at www.farizakhalid.com. Archives
October 2021
|
||||||
Connect with me:
Department of Learning and Teaching Innovations Faculty of Education Universiti Kebangsaan Malaysia 43600 Bangi Selangor MALAYSIA |
Site map: GE1155 Computer in Education GE2153 Educational Technology GE3404 Photography GA2123 Innovation & Technology in Teaching and Learning GB6013 Research Methods 1 GB6663 Pengajaran Pembelajaran Berbantu Komputer GE6433 Seminar Aliran Terkini dalam Pengajaran Sumber dan Teknologi Maklumat GE6543 Teknologi Maklumat dalam Pendidikan Research Support e-Learning Support Publication Supervision Awards When My Mind Speaks Guestbook |
This work by Dr. Fariza Khalid is licensed under a Creative Commons Attribution-NonCommercial-ShareAlike 4.0 International License.
Based on a work at www.farizakhalid.com.